Setting up your first Fill & Sign Document
In this tutorial, we'll go through how you can use the Fill & Sign Editor to set up the form of a Fill & Sign Document.
If you haven't created a Fill & Sign document yet, take a look at Creating your first Fill & Sign Document.
Once a Fill & Sign Document has been created, you can open it within the Fill & Sign Editor. Given that the PDF had no form fields you will see something like so:
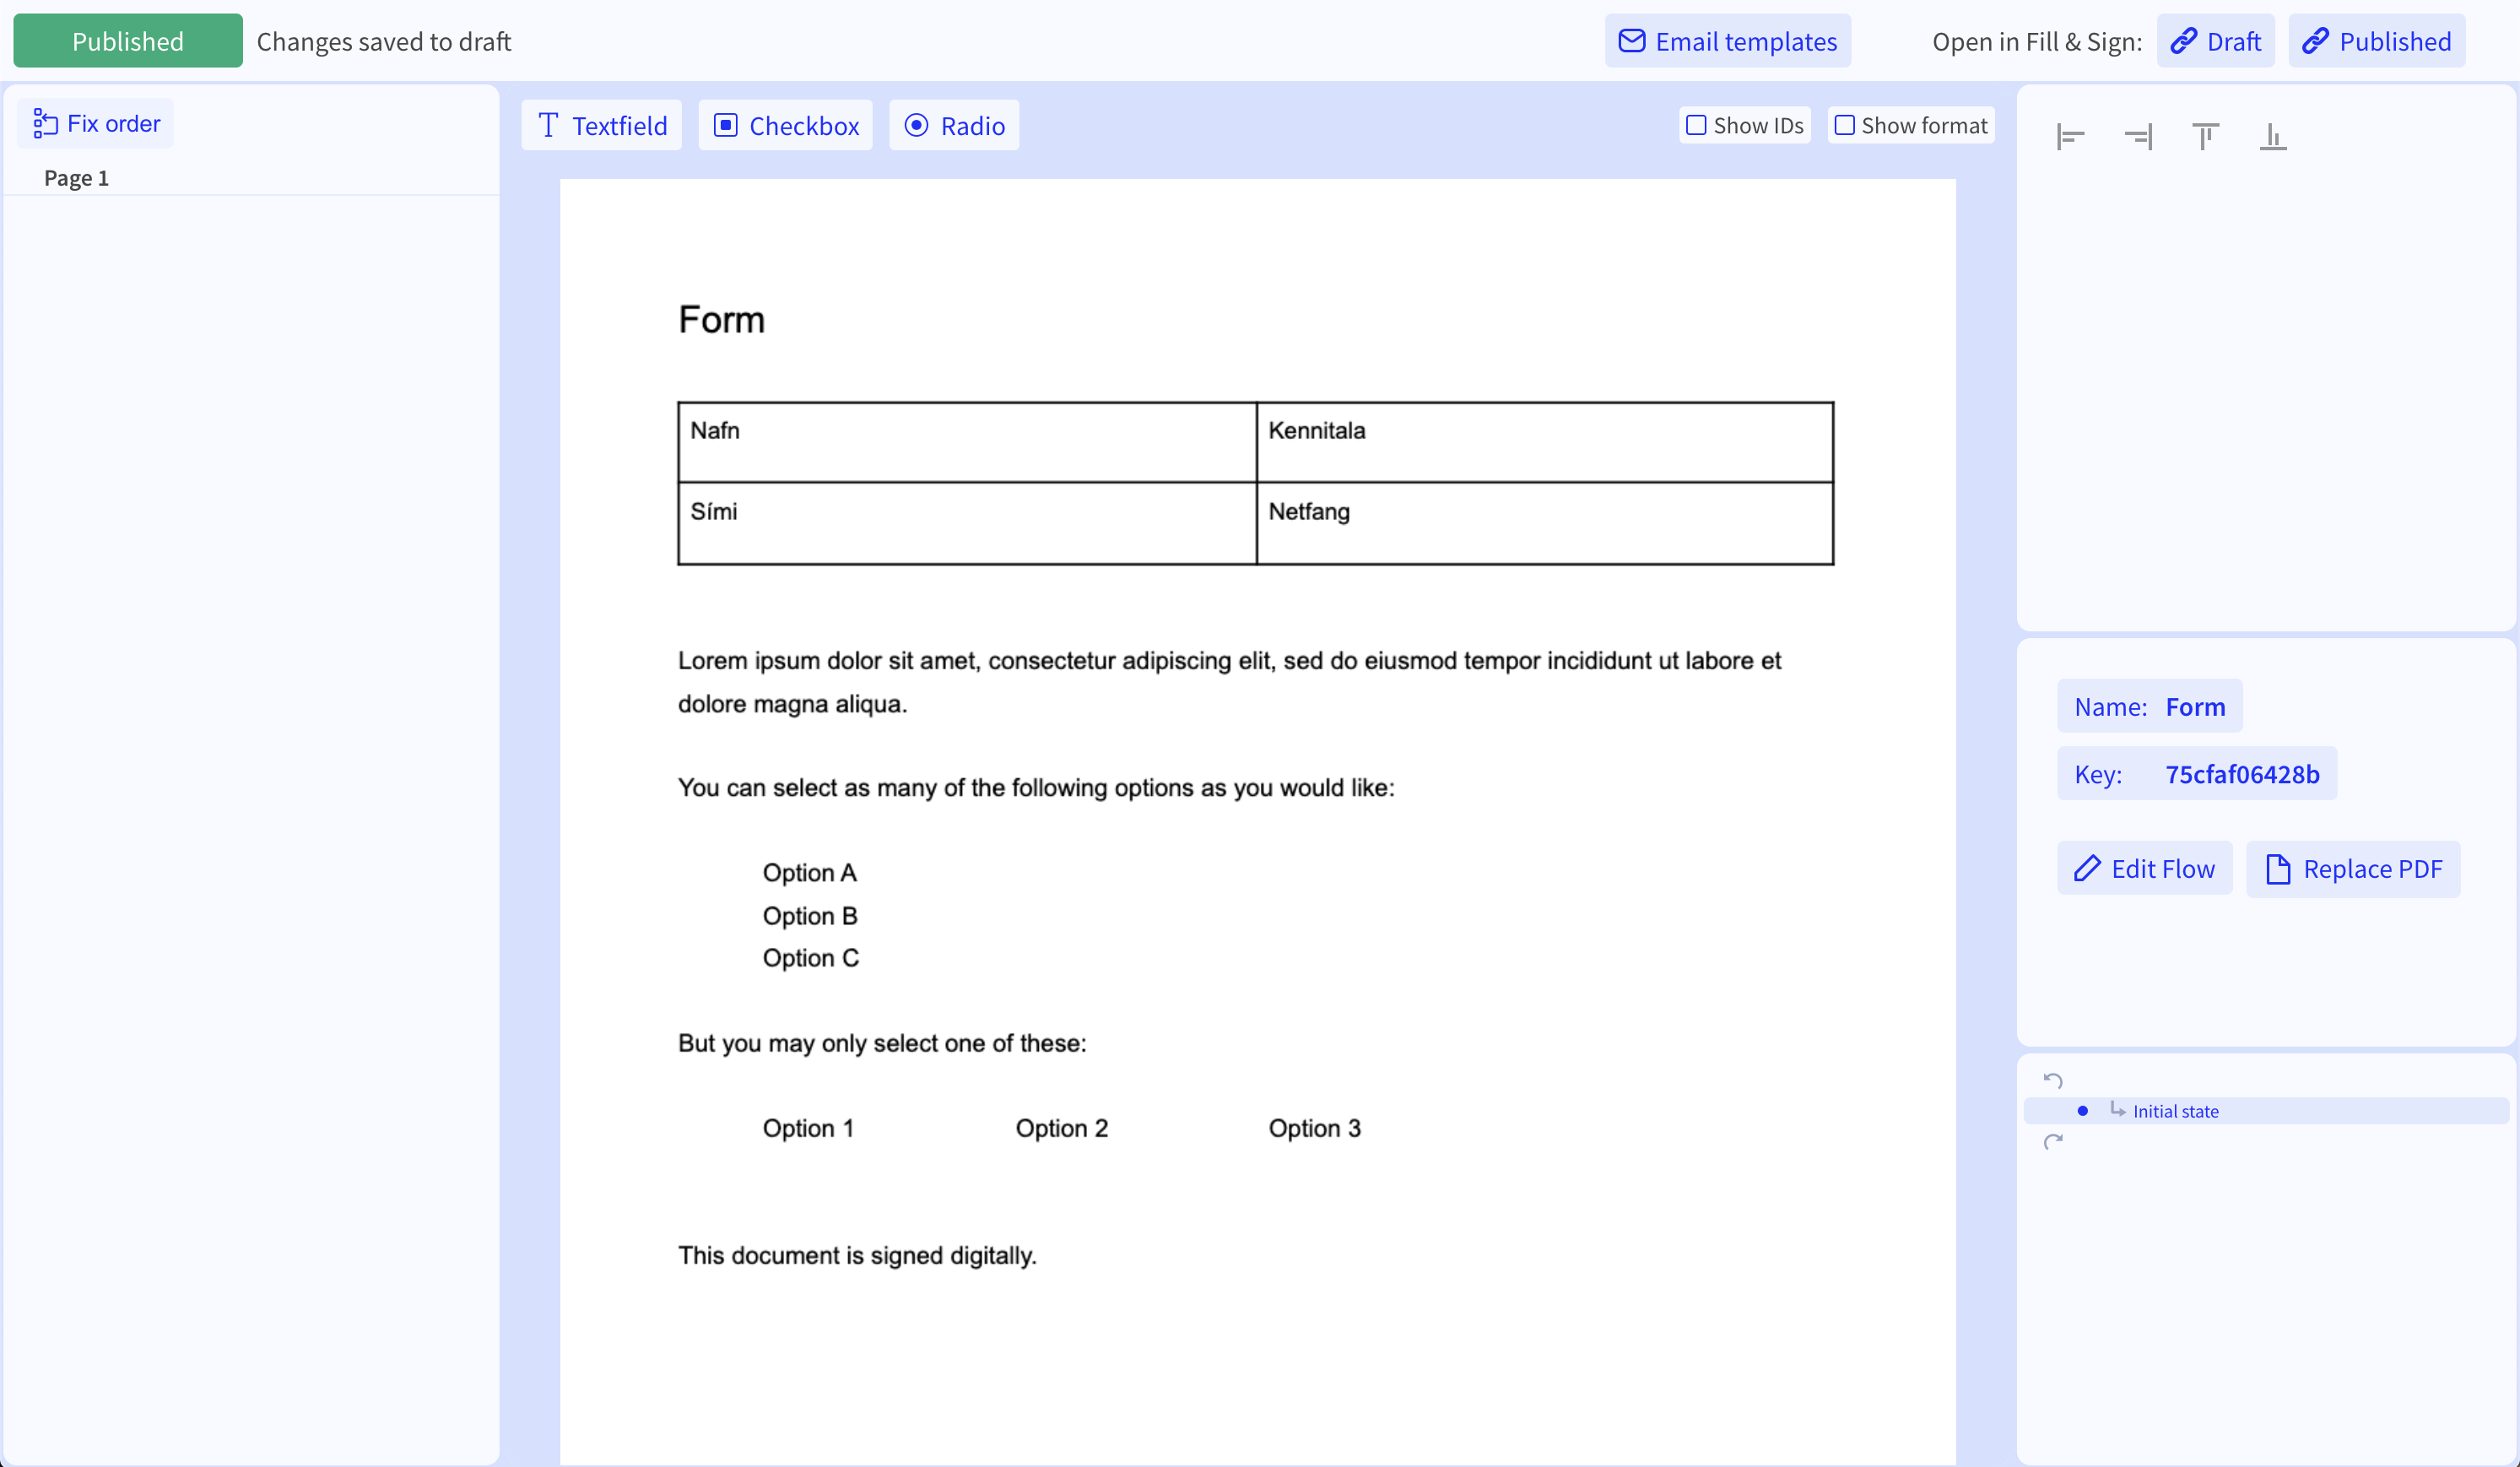
Textfields
For the first part, we have four textfields:

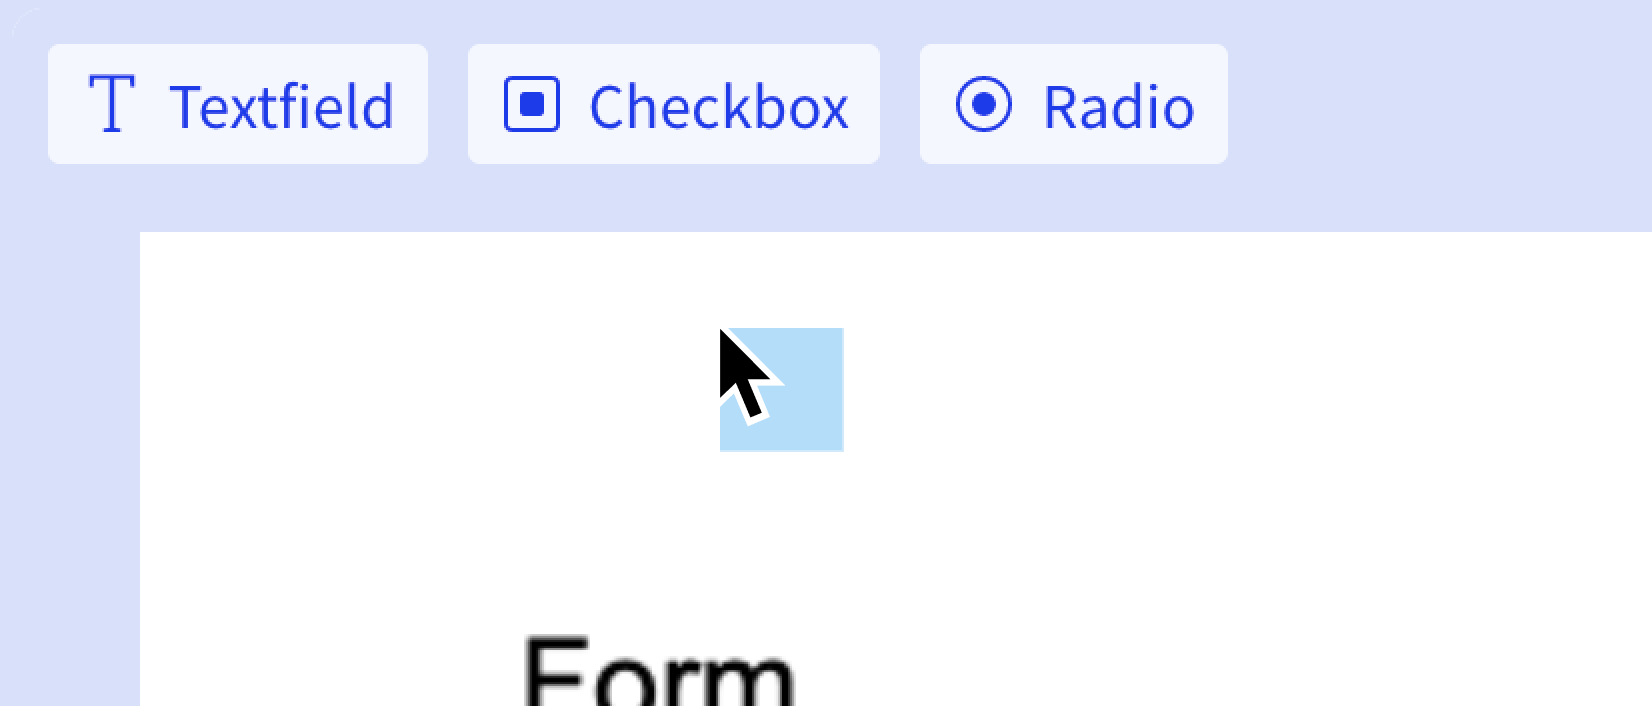
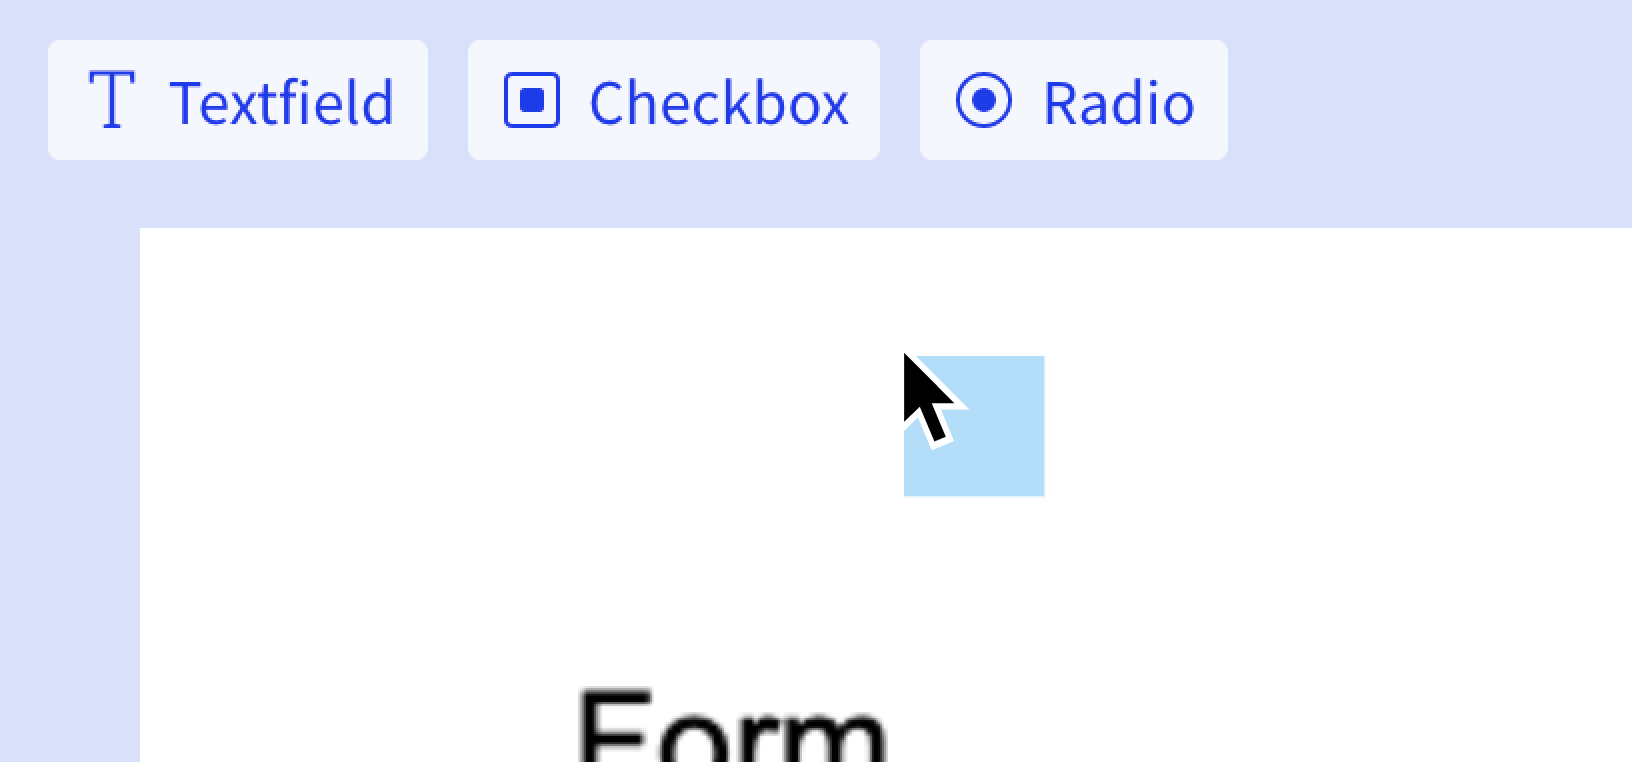
To create a textfield, you can click "Textfield" in the top-left corner of the document viewer:
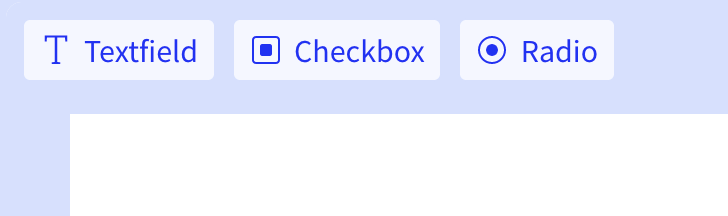
When clicked, you will notice a light blue box following your mouse.
When positioned correctly, you can click to create the field. You can also choose to click and drag to create a textfield of a specific size.
Once the field has been created, you can click and drag the corners and sides to resize the field to the desired size.


That's one field down, three to go!
Since the "Name" field is correctly sized and positioned well, it would make sense to reuse it for the other three fields.
To duplicate the field, hold Alt (or ⌥ Option on macOS) and click and drag
the copy of the field to where you want it to be.

Note: To only move the field horizontally or vertically you can hold Shift ⇧
while moving it. This works both when duplicating fields and moving existing
fields. Try pressing and unpressing Shift ⇧ while moving a field to get a
sense of how this works.
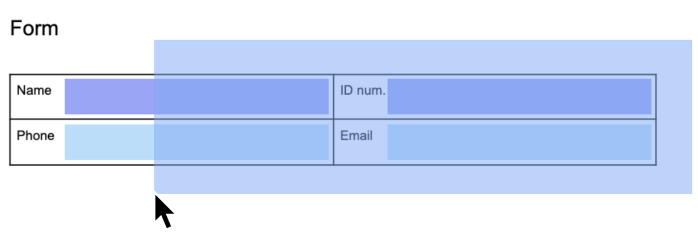
The "ID num." field is now the selected field. We can add the "Name" field to
the selection by holding Shift ⇧ and clicking it:

Now that both fields are selected, we can duplicate them together just like we did with the "Name" field.

Now the textfields are in place. These are fields that the user must fill out so let's make them required.
Select them all by clicking and dragging a rectangle around them.
Field properties
Once the fields are selected, you can take a look at the top-right section of the editor:
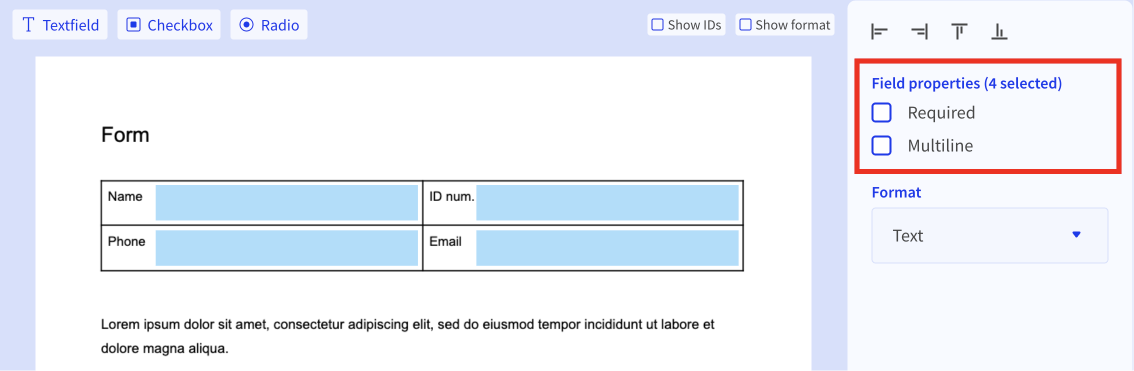
We see that there are 4 selected fields, which is correct. By clicking on the "Required" checkbox we can ensure that the user fills out these fields.
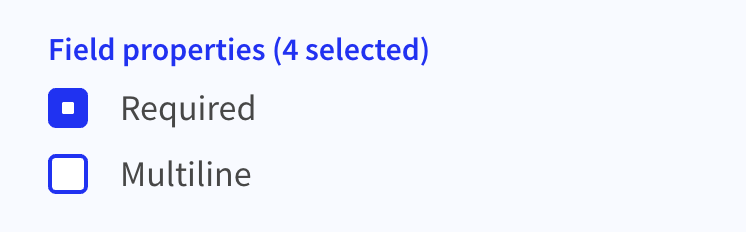
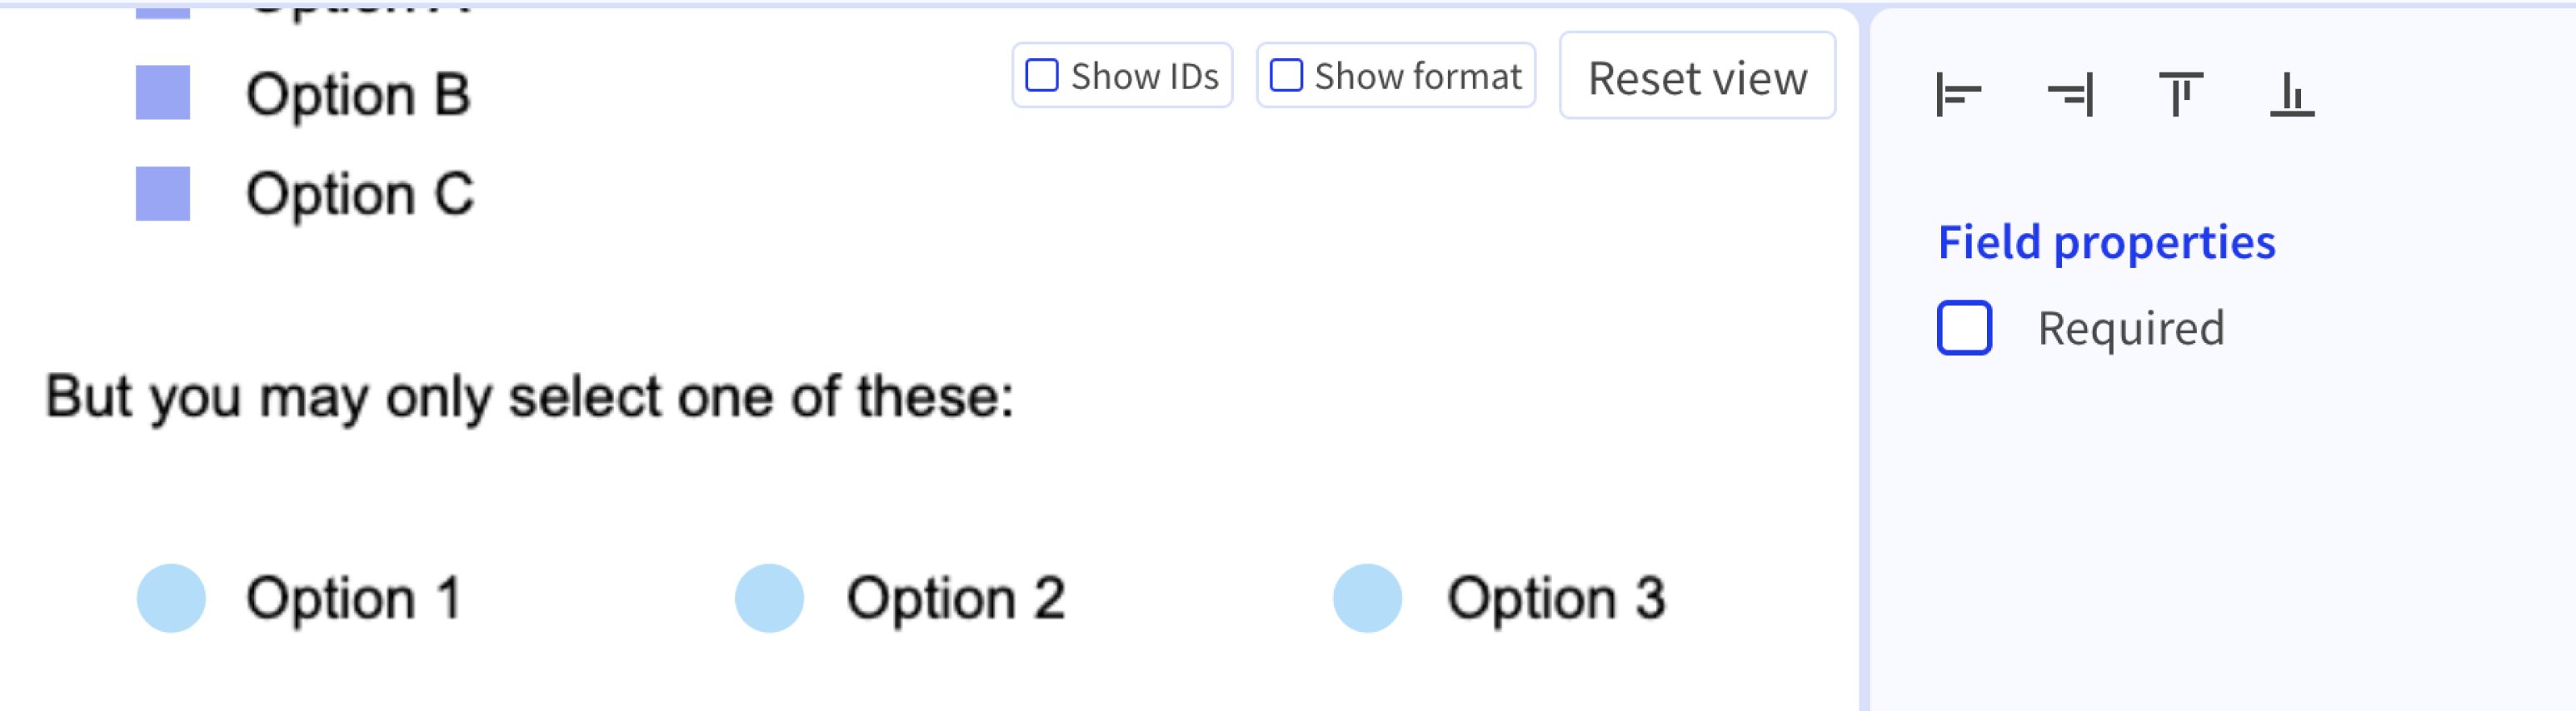
Format
You may also have noticed that there is a "Format" dropdown. It supports a few different formats that the user's input must match:
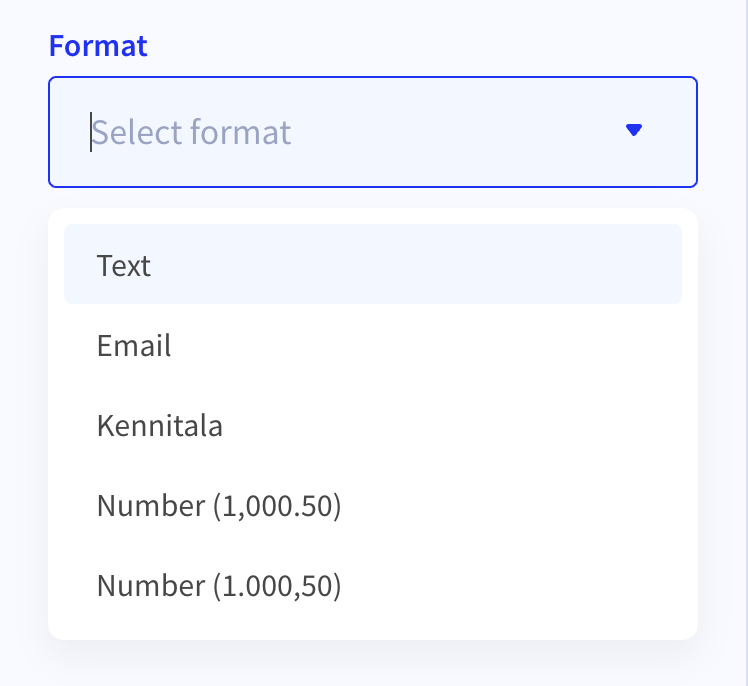
We can use this to, for example, set the format email field's format to "Email". This means that the user will have to add a valid email address to continue.
Current document
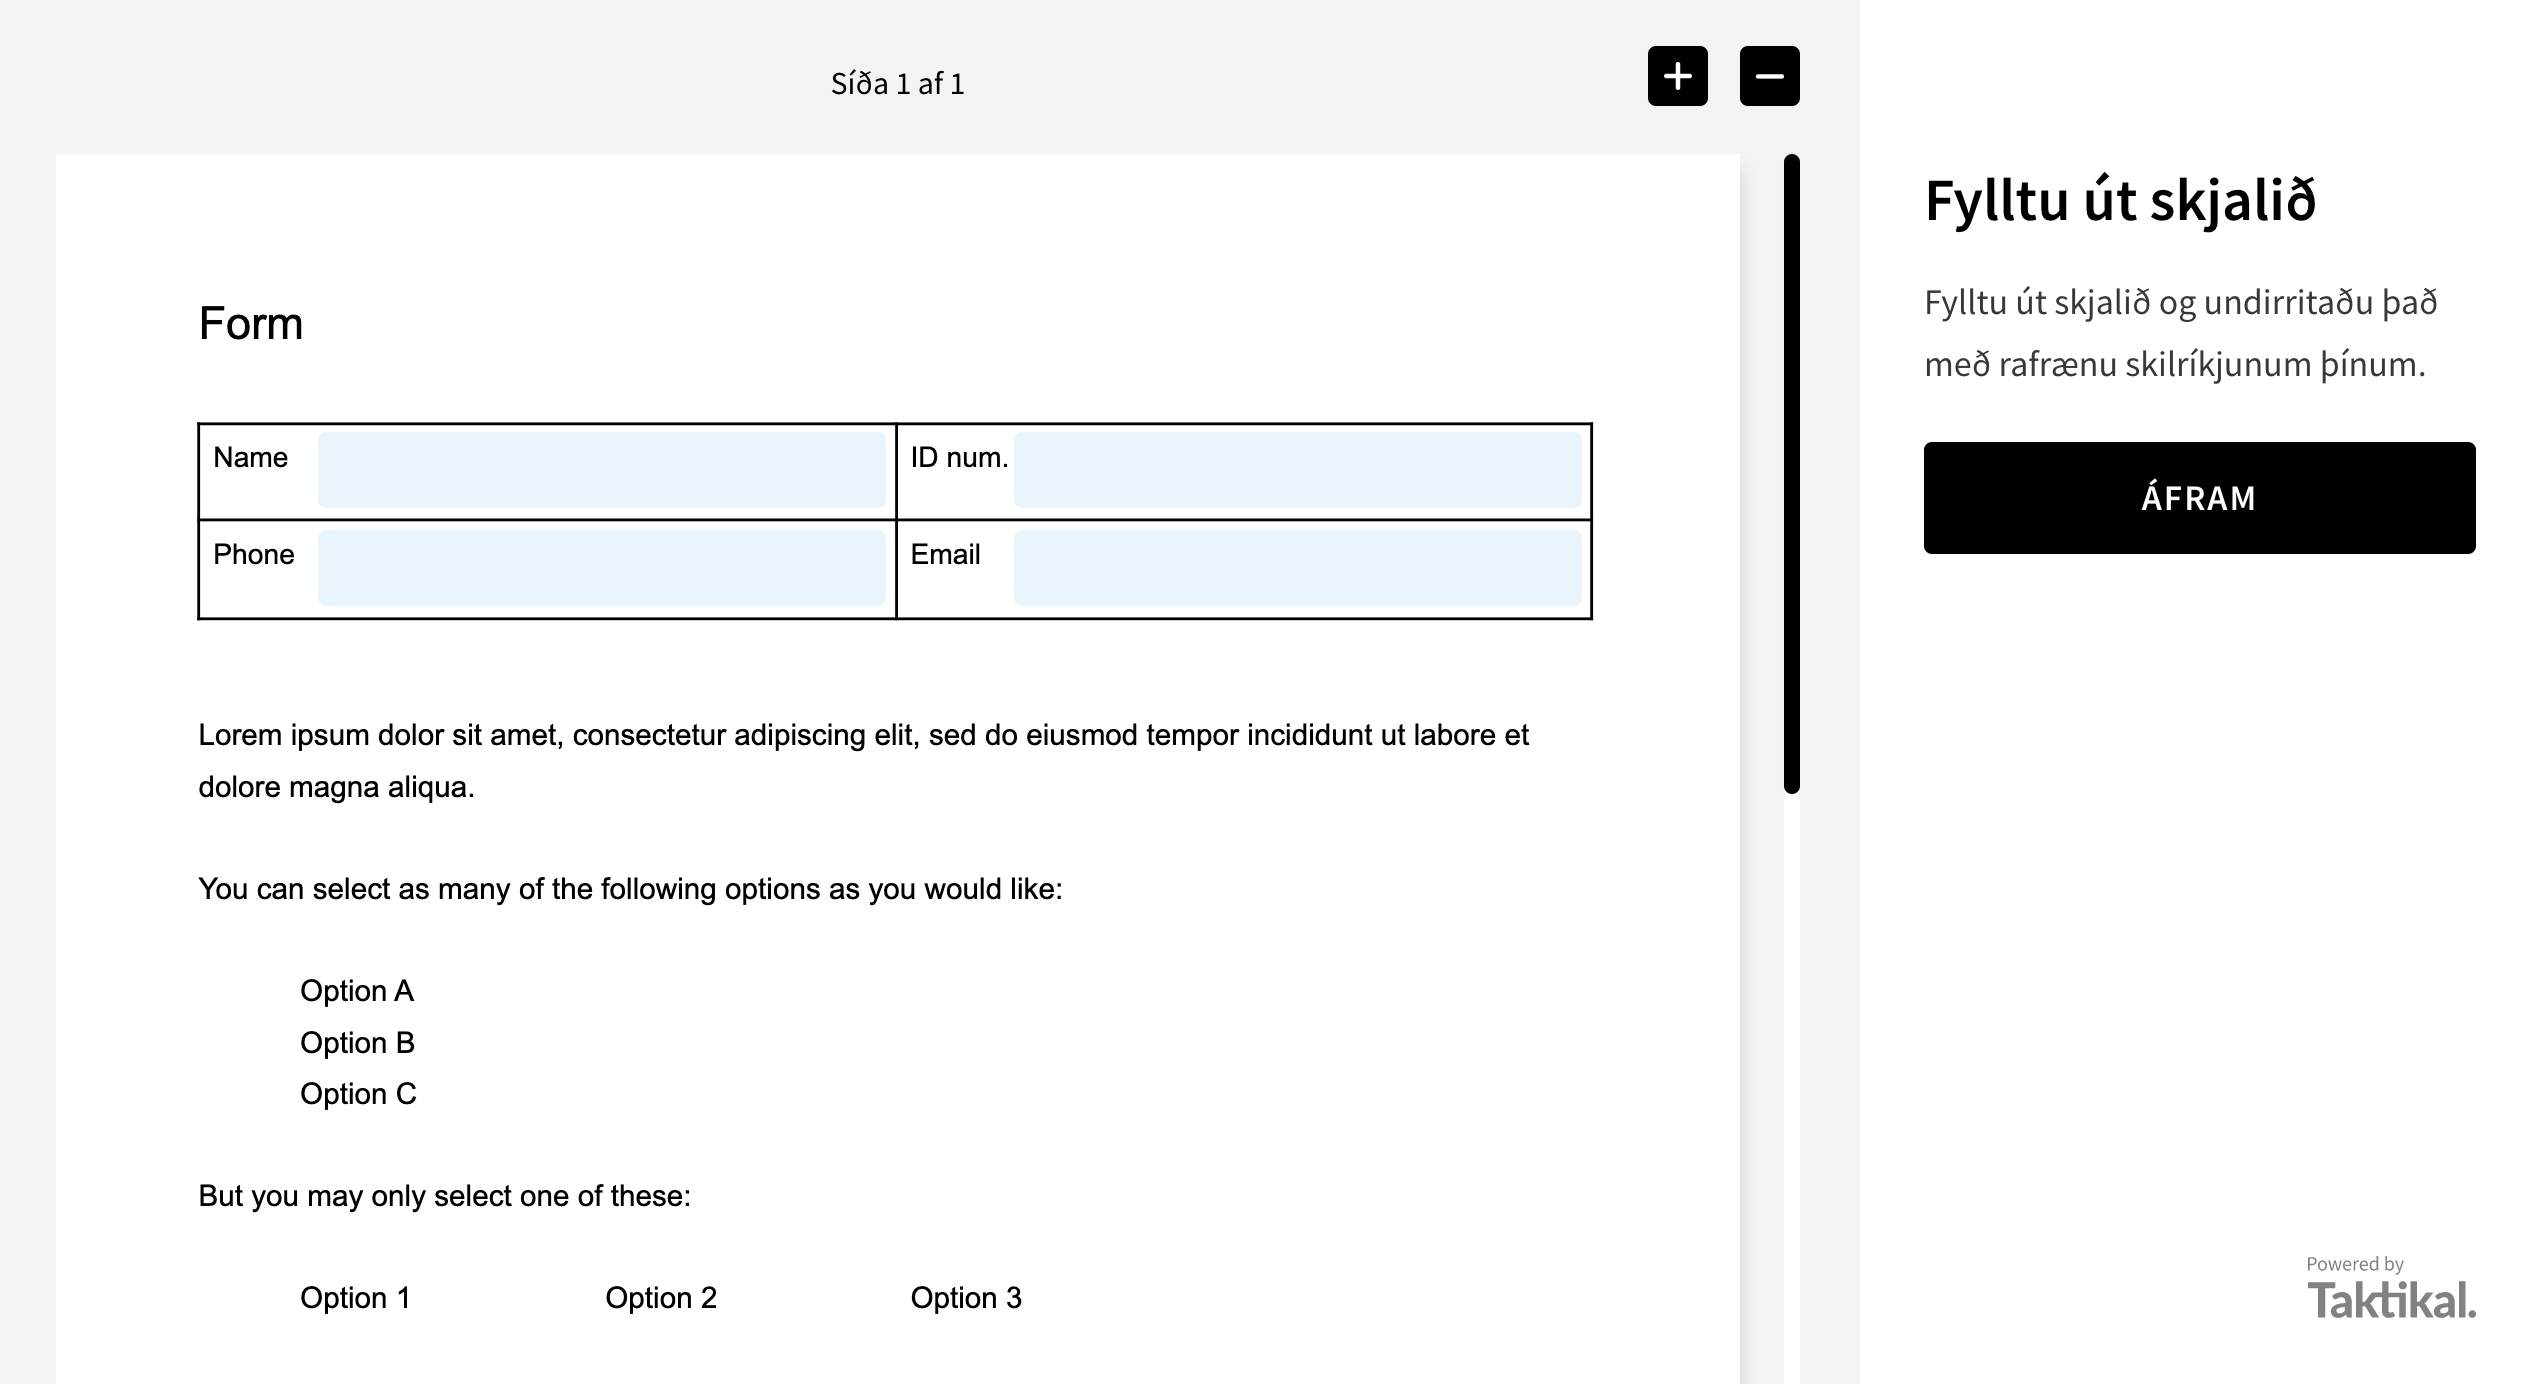
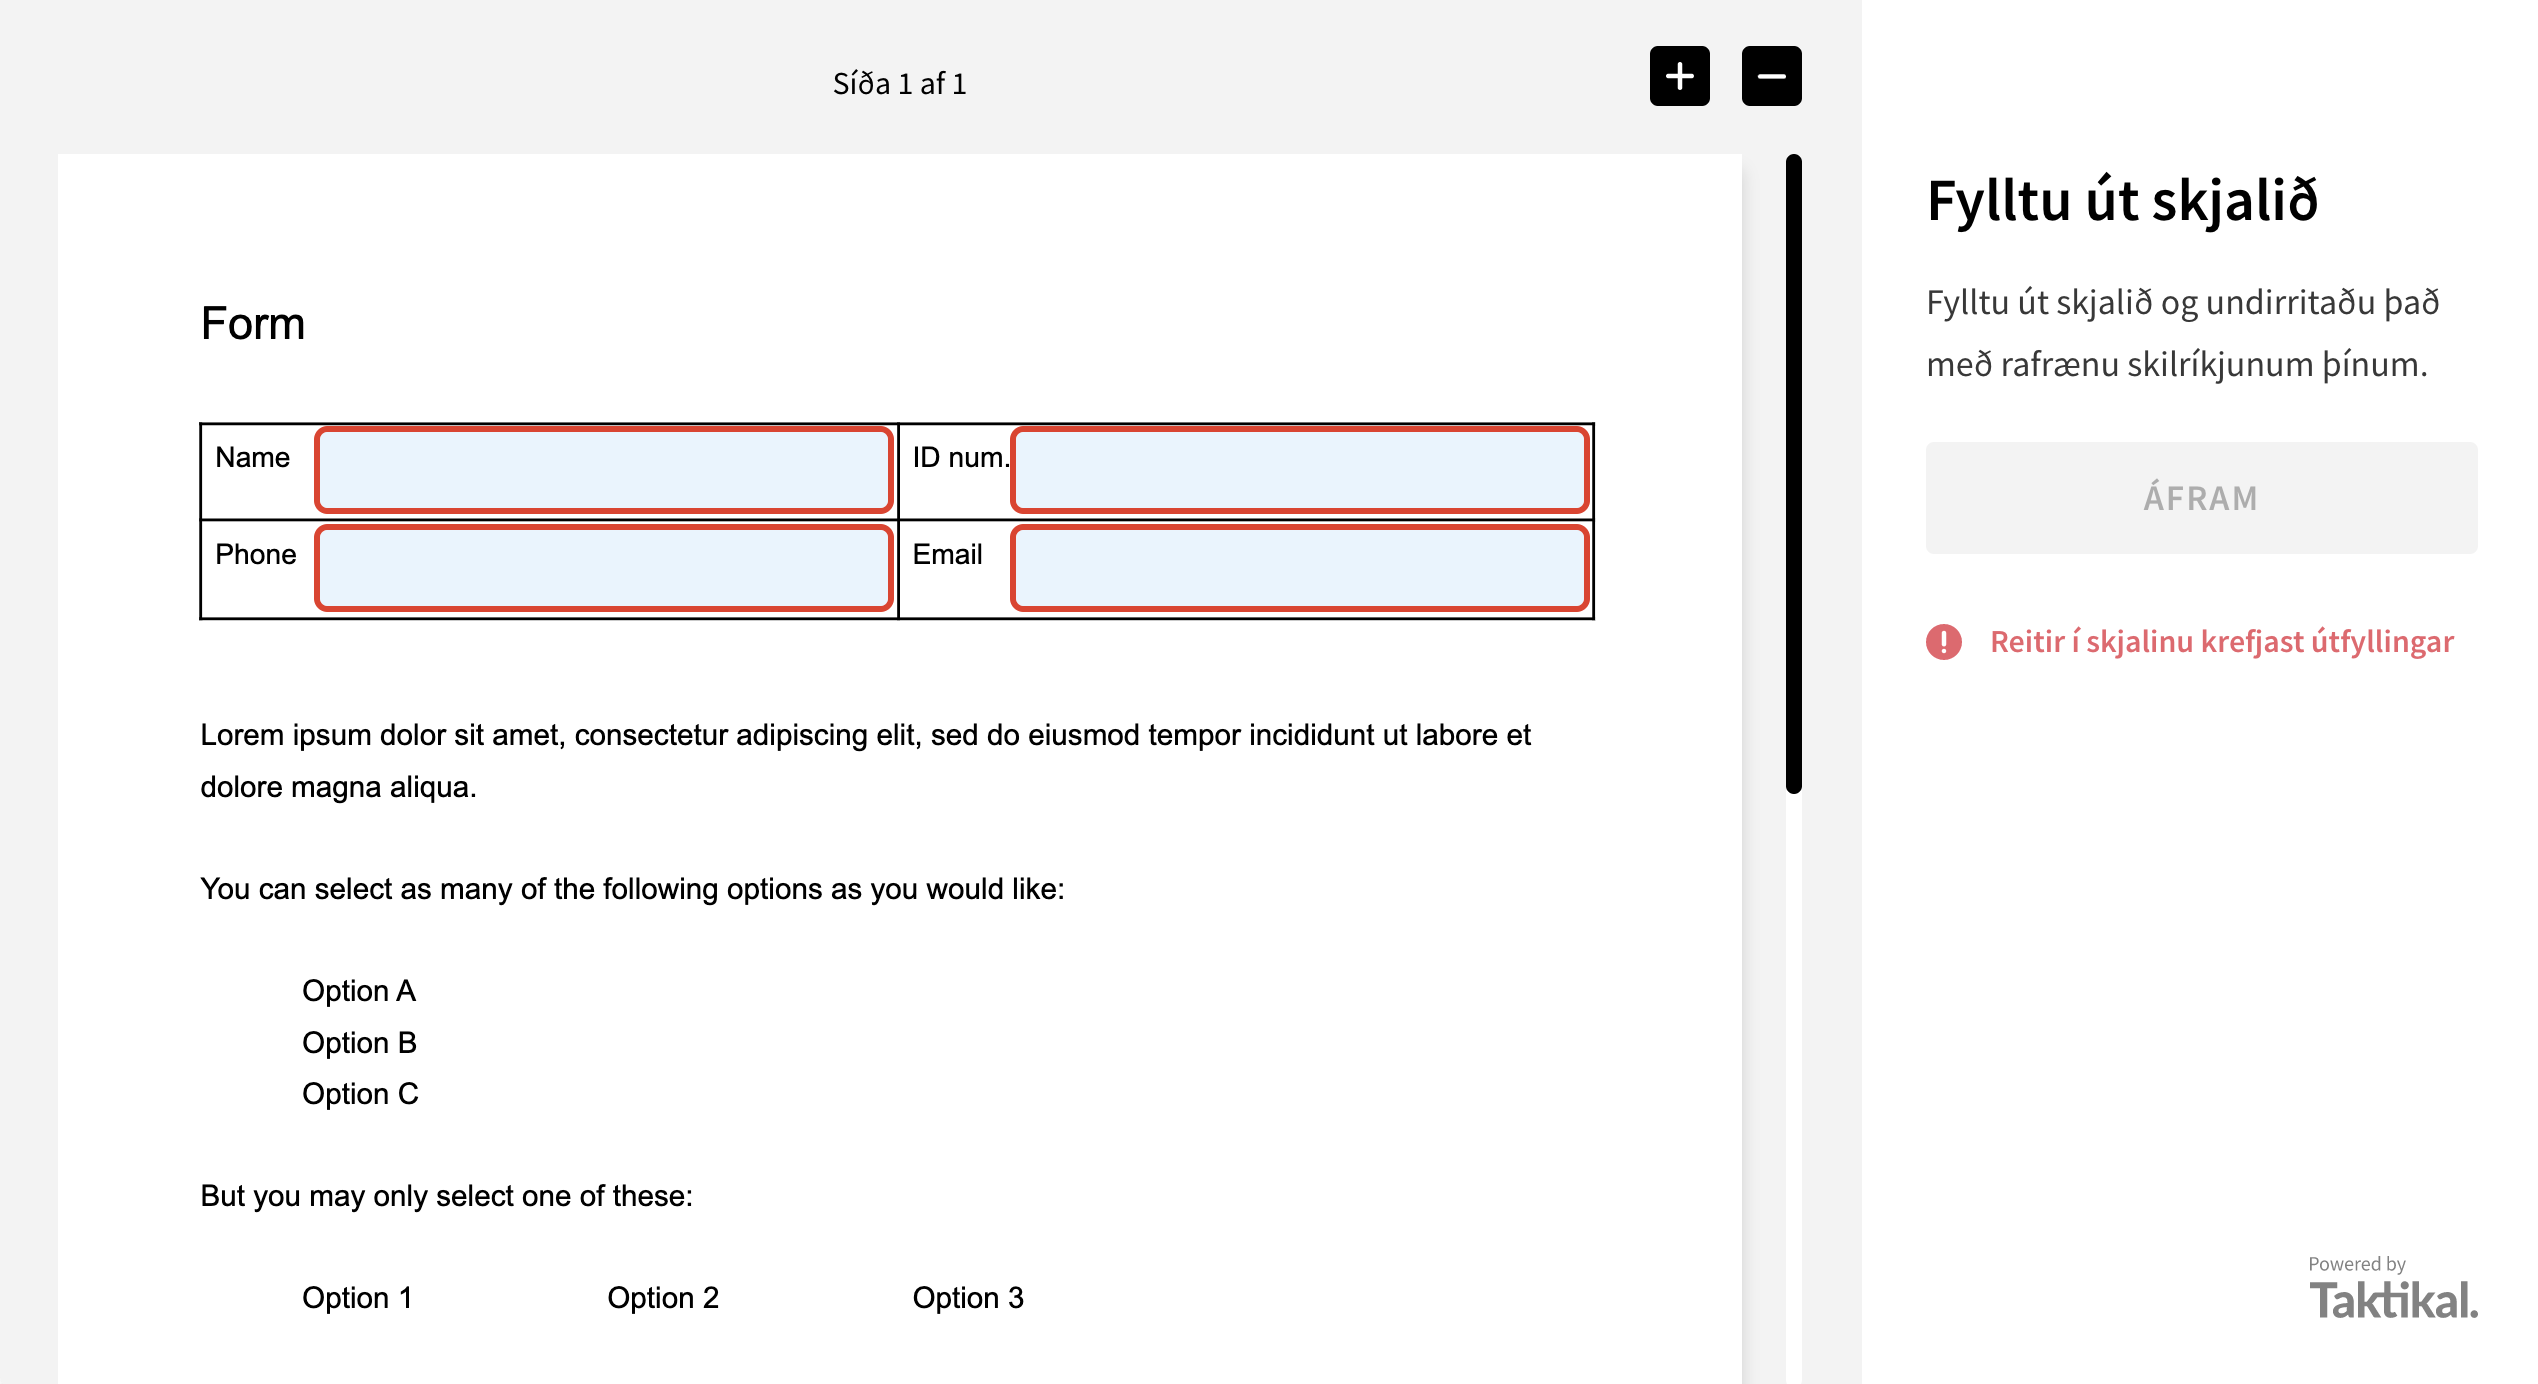
Let's take a look at the current version of the document in Fill & Sign to see how the document looks. You can do that by clicking "Draft" in the "Open in Fill & Sign" section in the top-right of the editor:

Once the document is opened, we see our four textfields:
If we attempt to continue without filling them out, the required fields will be highlighted so the user knows what needs to be filled out:
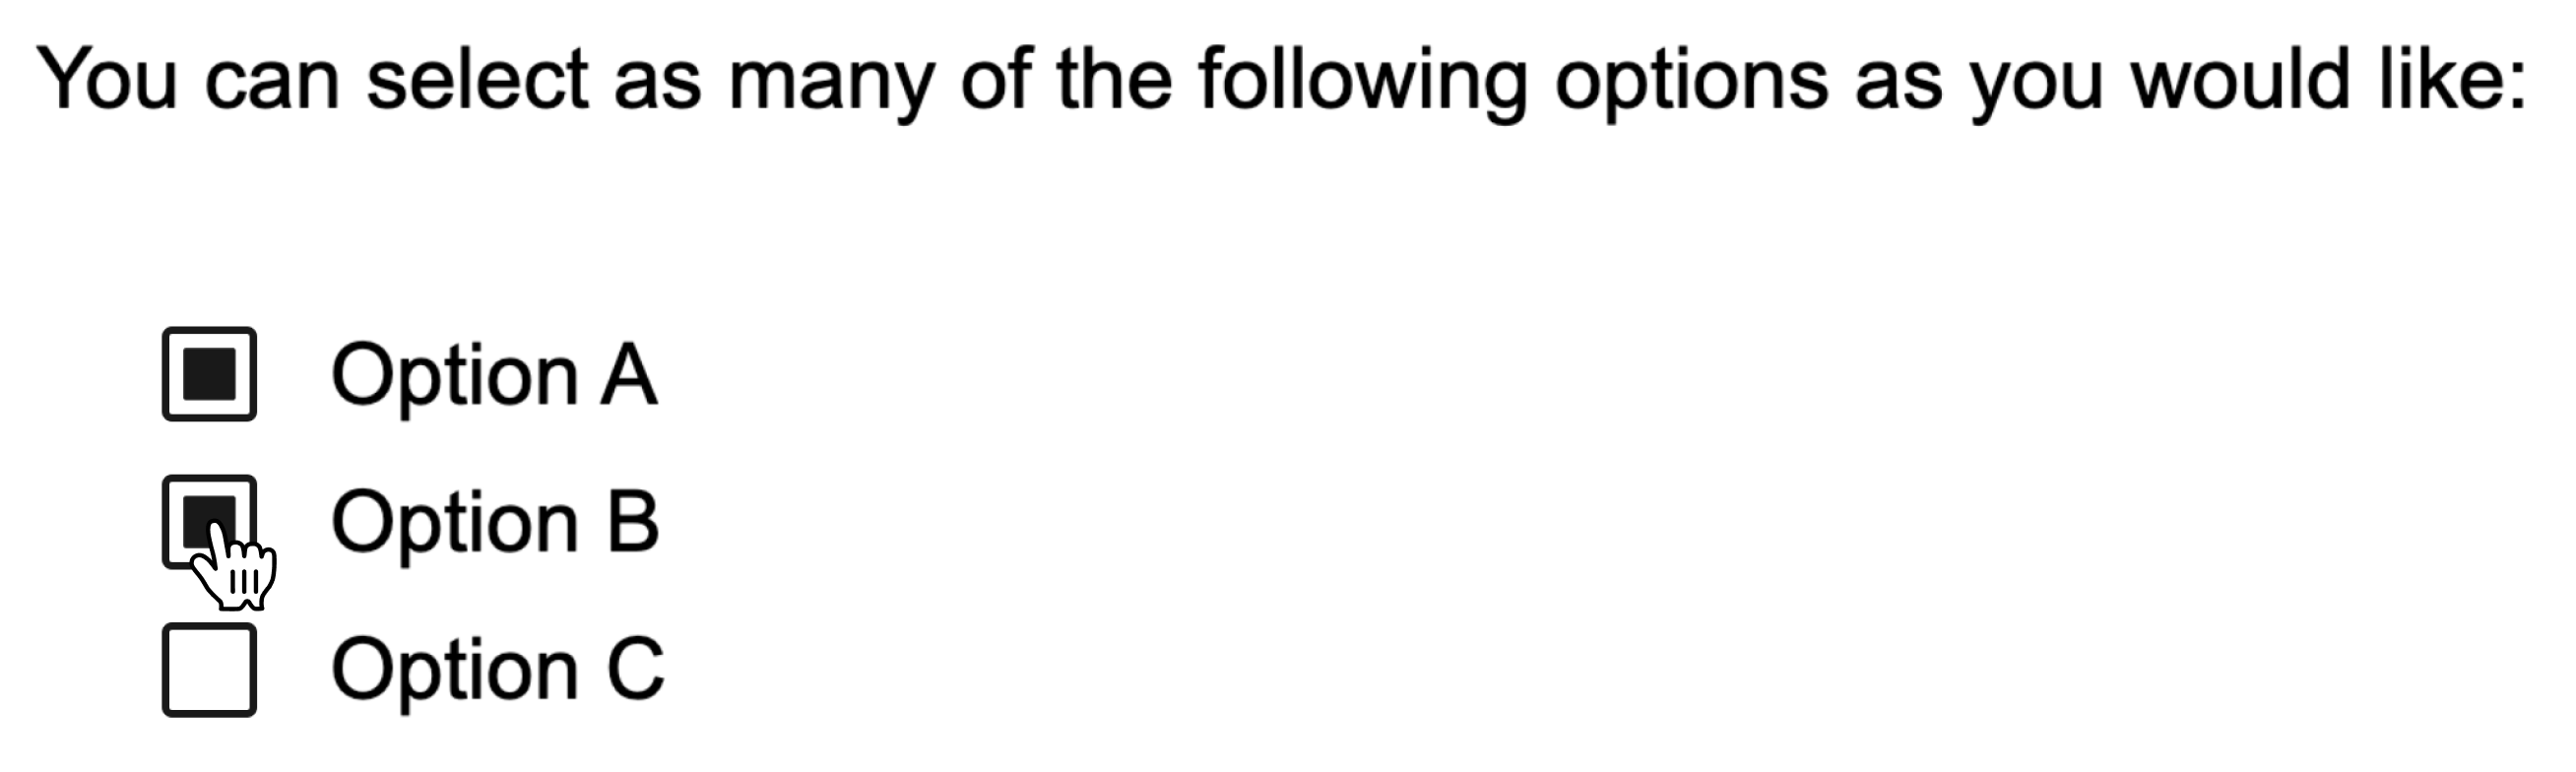
Back to the document. We now have a section where the user can select as many or as few of the options as he wants.
Checkbox
For this, we can use checkboxes. Click the "Checkbox" button in the top-left of the window to start adding a checkbox.
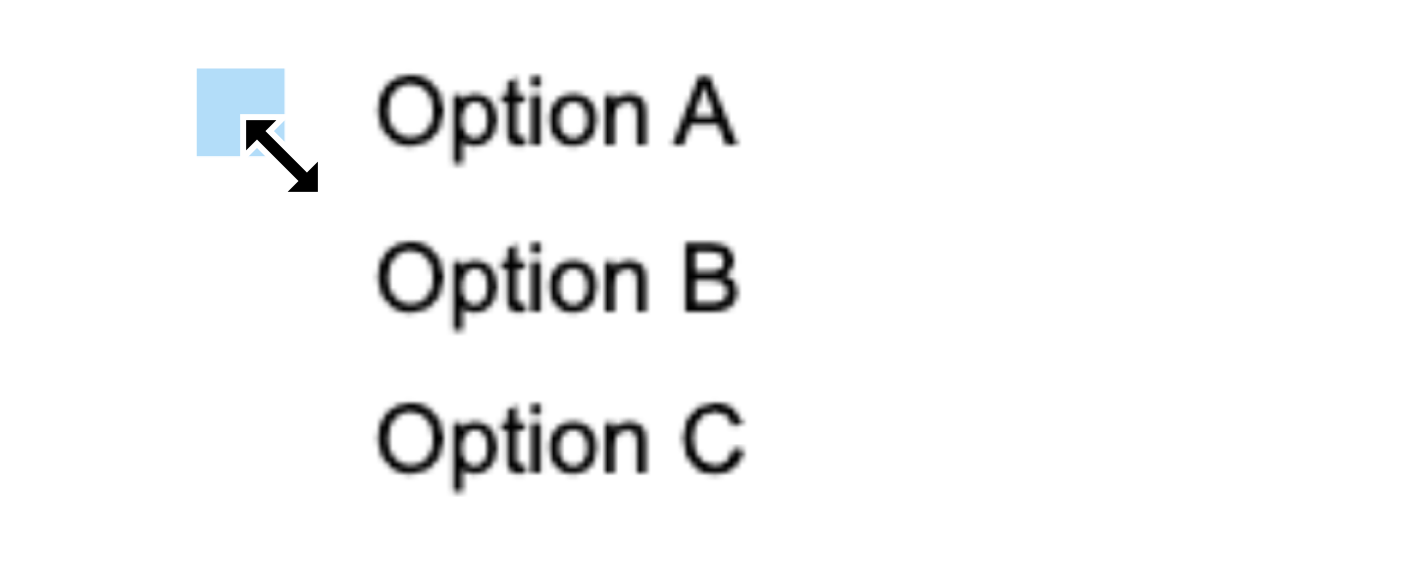
Then click to add the checkbox in the correct place:

Resizing checkboxes
It's a bit bigger than I would like. We can drag the corner to resize it.
We can then do as we did with the textfields and duplicate the checkbox by
holding Alt (or ⌥ Option on macOS) and click-and-dragging the copy of the
checkbox to where you want it to be.

We now have a list of checkboxes where the user can check as few or as many of the fields as he wants.
Radio buttons
The next section is slightly different.

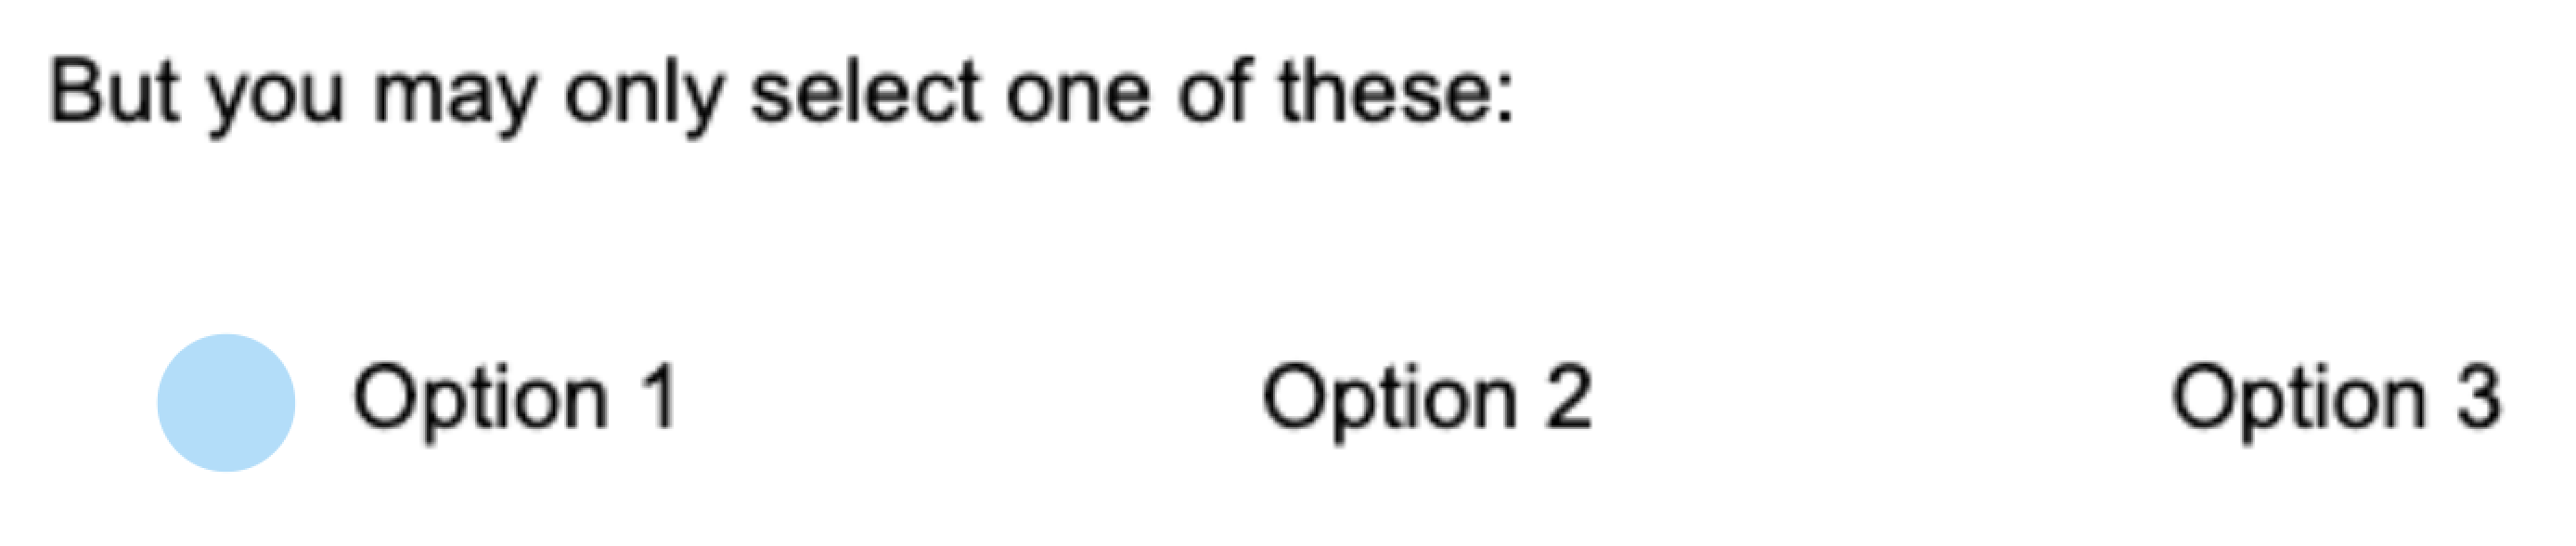
The user also has to select an option, but only one of the options.
This is a case for radios. Click the "Radio" button in the top-left of the window to start adding a radio.
As before, click to add the field in the correct place.
Resizing radio buttons
Just a tad bigger than I would like. We can make the field smaller like we did with the checkbox.

Once again, we can duplicate these fields by holding Alt (⌥ Option on macOS)
and click-and-dragging the copy of the radio option to where you want it to be.
Radio button grouping
Radios work slightly differently than textfields and checkboxes. If you take a
look at the list of fields on the left side, you notice that we have a radio
group with three options.
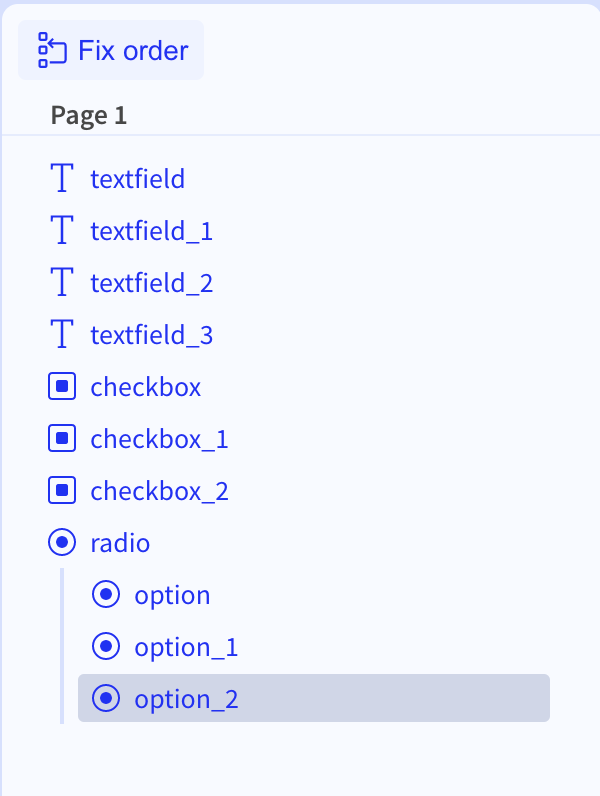
We see the textfields and checkboxes we added before as individual fields, but the options we just added are grouped together.
Because radios only allow one of the options to be selected, we have to group radio options together so we know which options belong together.
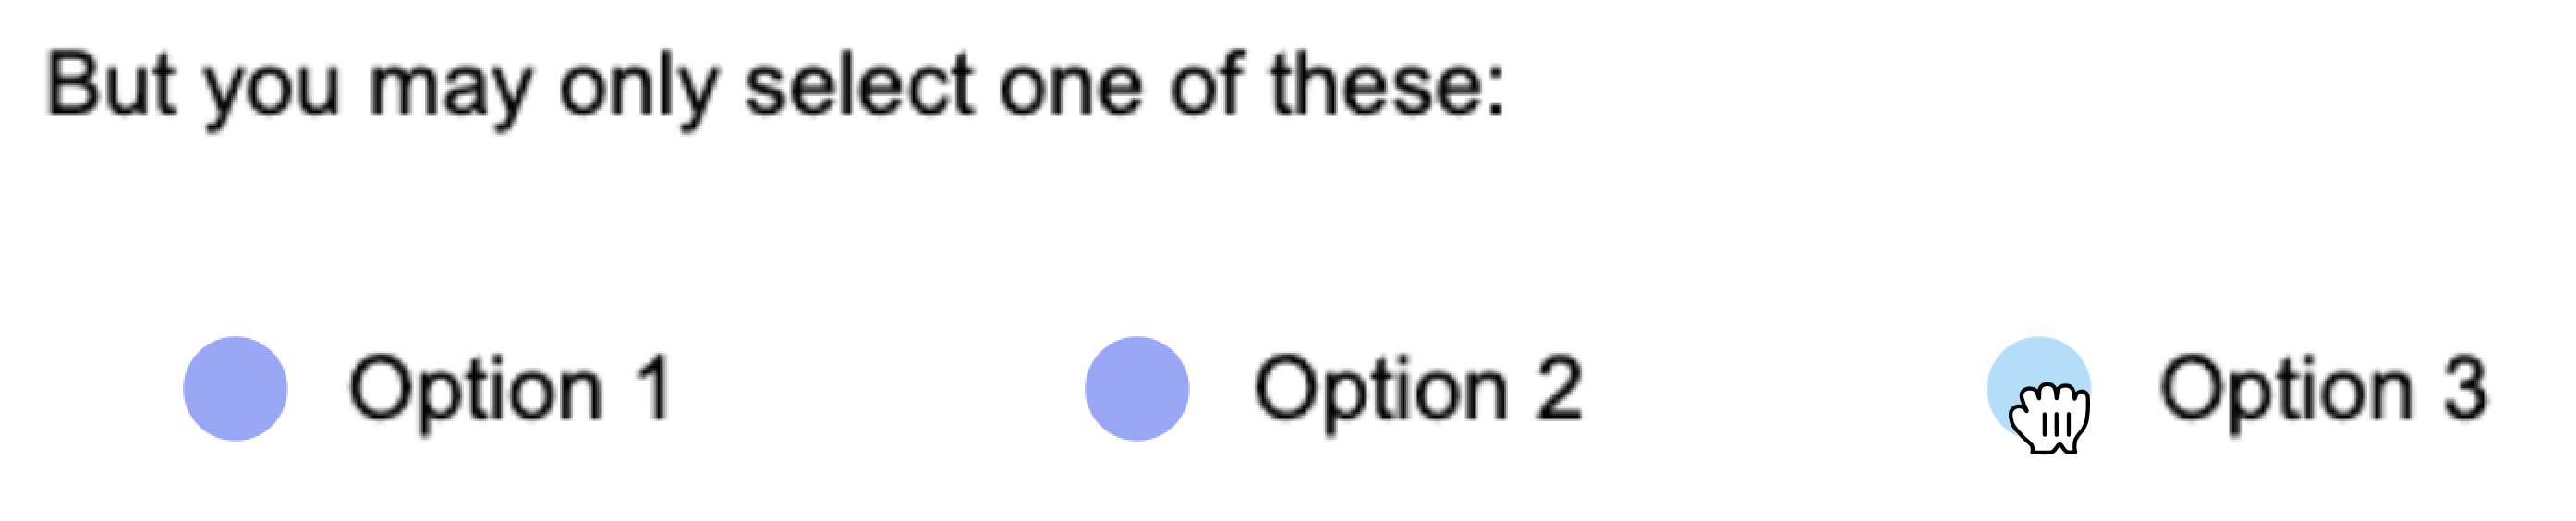
If we now open the document in Fill & Sign, we have a radio where only one of the options can be selected.

And if we go back to the editor and select all of the options in the group, we can make the group required:
The fields for our document are now ready. You can publish the current version of the document by clicking the "Publish" button in the top-left corner.

Once published, you will see the button turn green.

Further Reading
You can learn more about our "Draft & Publish" feature here:
Draft & Publish
We've published our Fill & Sign document, but we have yet to specify what should happen after the user has filled out and signed the document. You can learn how to configure the document's delivery here:
Document Delivery
Once the document's delivery has been set up, you can figure out how you want to use the Document (e.g. adding it to your Website or sharing it via a Link):
Using a Fill & Sign Document
There are lots of shortcuts to make working with the Fill & Sign Editor easier. You can learn more about them here:
Keyboard Shortcuts
If your document needs to be signed by multiple people, you can learn how to specify the number of signees here:
Multiple Signees
If you need to take your Fill & Sign document down, you can learn how to deactivate it here:
Deactivate a flow